
General
How to Take Out Partial Dentures: A Step-by-Step Guide
Introduction
Many people feel anxious about how to handle their partial dentures, especially when it comes to removing them. We understand that knowing the right techniques can make a big difference in your comfort and the lifespan of your dentures. This guide offers a comprehensive, step-by-step approach to safely and effectively take out partial dentures, addressing common concerns and providing practical solutions.
If your dentures feel stuck or uncomfortable, you’re not alone; many face this challenge. But with the right guidance, you can learn to navigate these challenges with ease, ensuring your comfort and confidence.
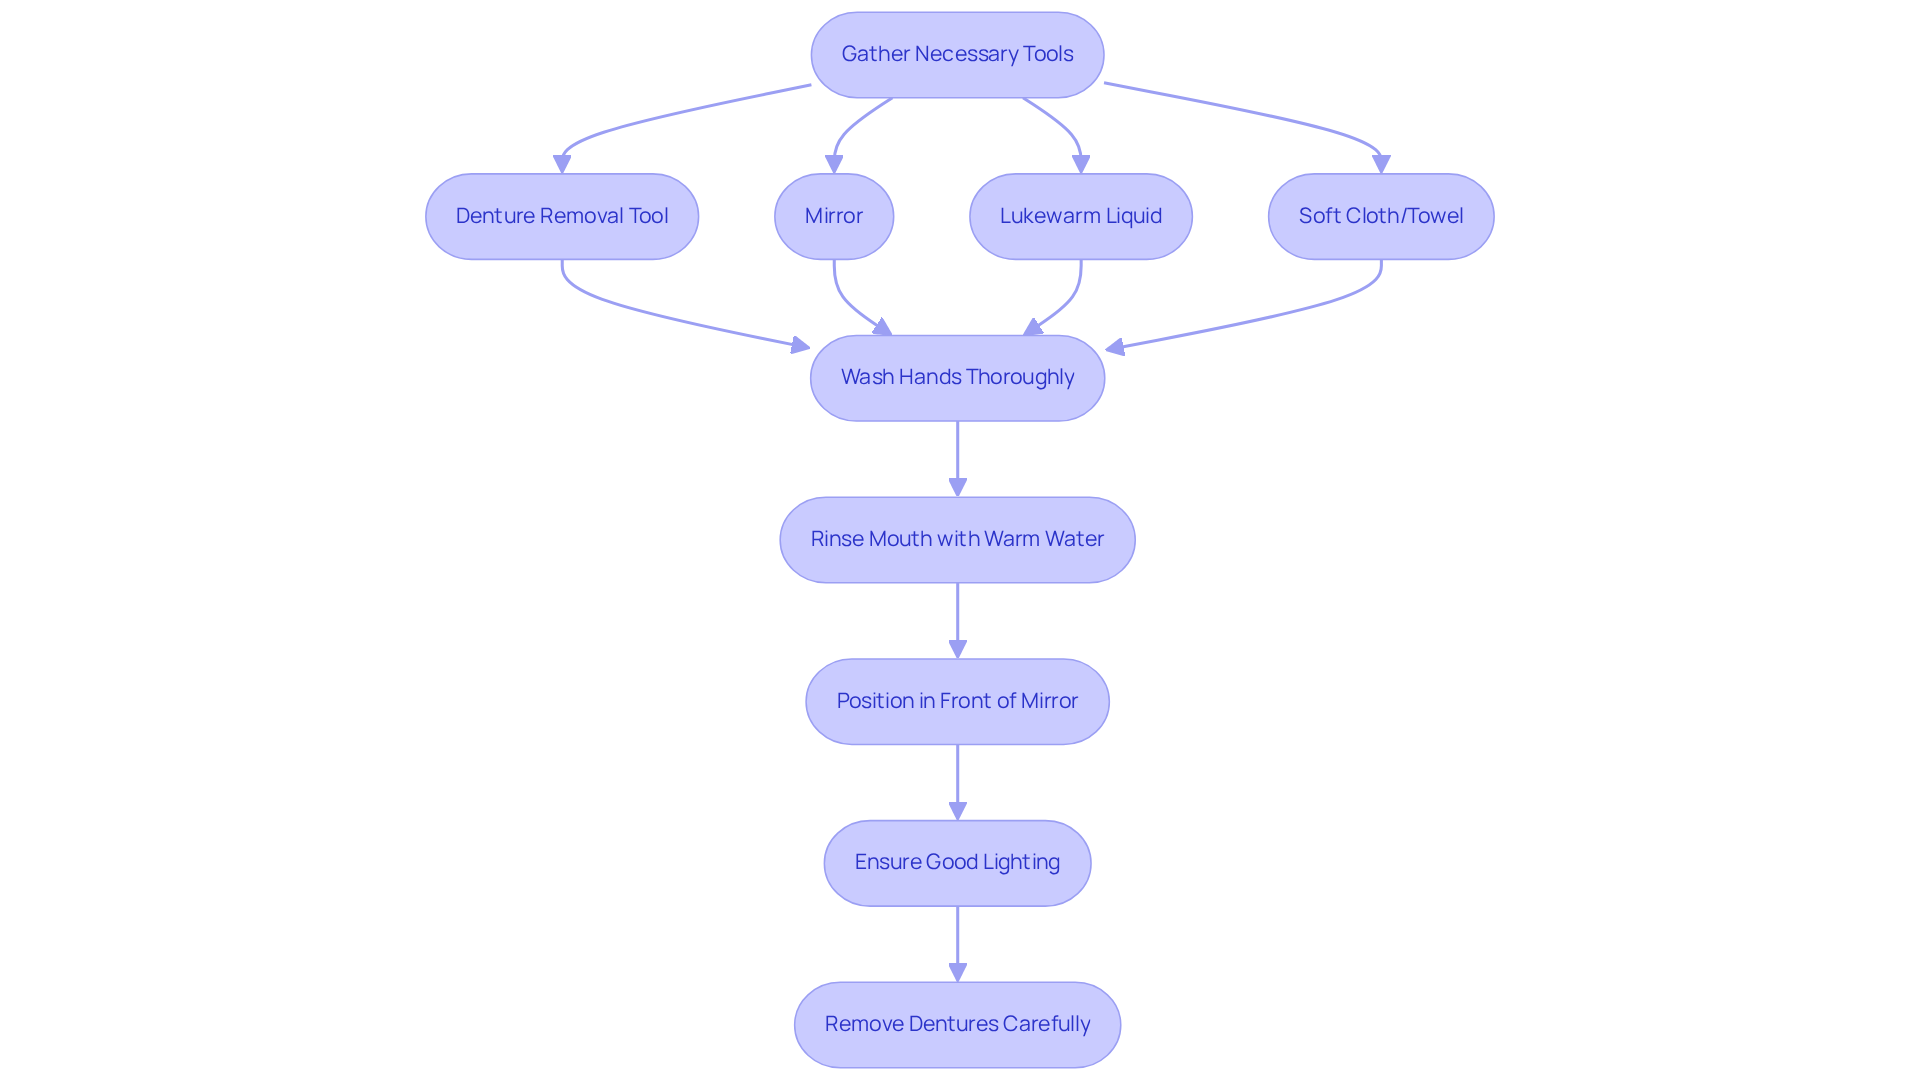
Gather Necessary Tools and Prepare for Removal
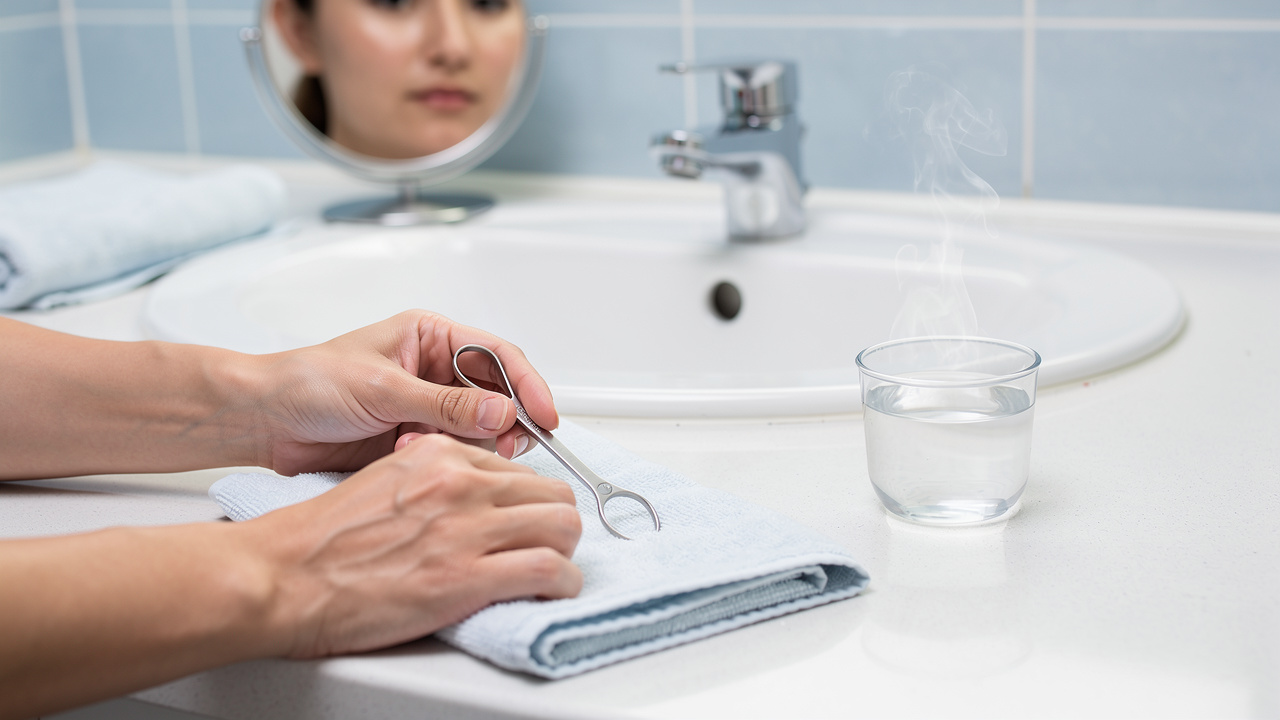
Although it can feel daunting, knowing how to take out partial dentures means you’re not alone in this experience. Before you begin, gather a few helpful tools to make the process smoother:
- A denture removal tool can assist in easing the dentures out without applying excessive force, which is especially beneficial if you have limited grip strength or arthritis. Many people worry about pulling too hard or dealing with suction, so having this tool on hand can be a real comfort.
- A mirror, whether handheld or wall-mounted, will help you see what you’re doing, ensuring a more controlled extraction process.
- Rinsing your mouth with lukewarm liquid can help loosen any suction or food particles that may be keeping the prosthetics in place.
- Don’t forget a soft cloth or towel to catch the dental appliance if it slips during removal.
Before you start, wash your hands thoroughly to prevent any bacteria from entering your mouth. Rinse your mouth with warm water to help loosen any debris or suction. Position yourself comfortably in front of a mirror, ensuring good lighting to see your dental appliance clearly.
Using a tool can make it easier to understand how to take out partial dentures. Many people worry about pulling too hard or dealing with suction. Remember, it’s okay to take your time. If your dentures feel too tight, don’t hesitate to reach out to your dentist for help. Taking care of your dentures is a small step towards ensuring your comfort and confidence every day.
Insert Partial Dentures Correctly Before Removal
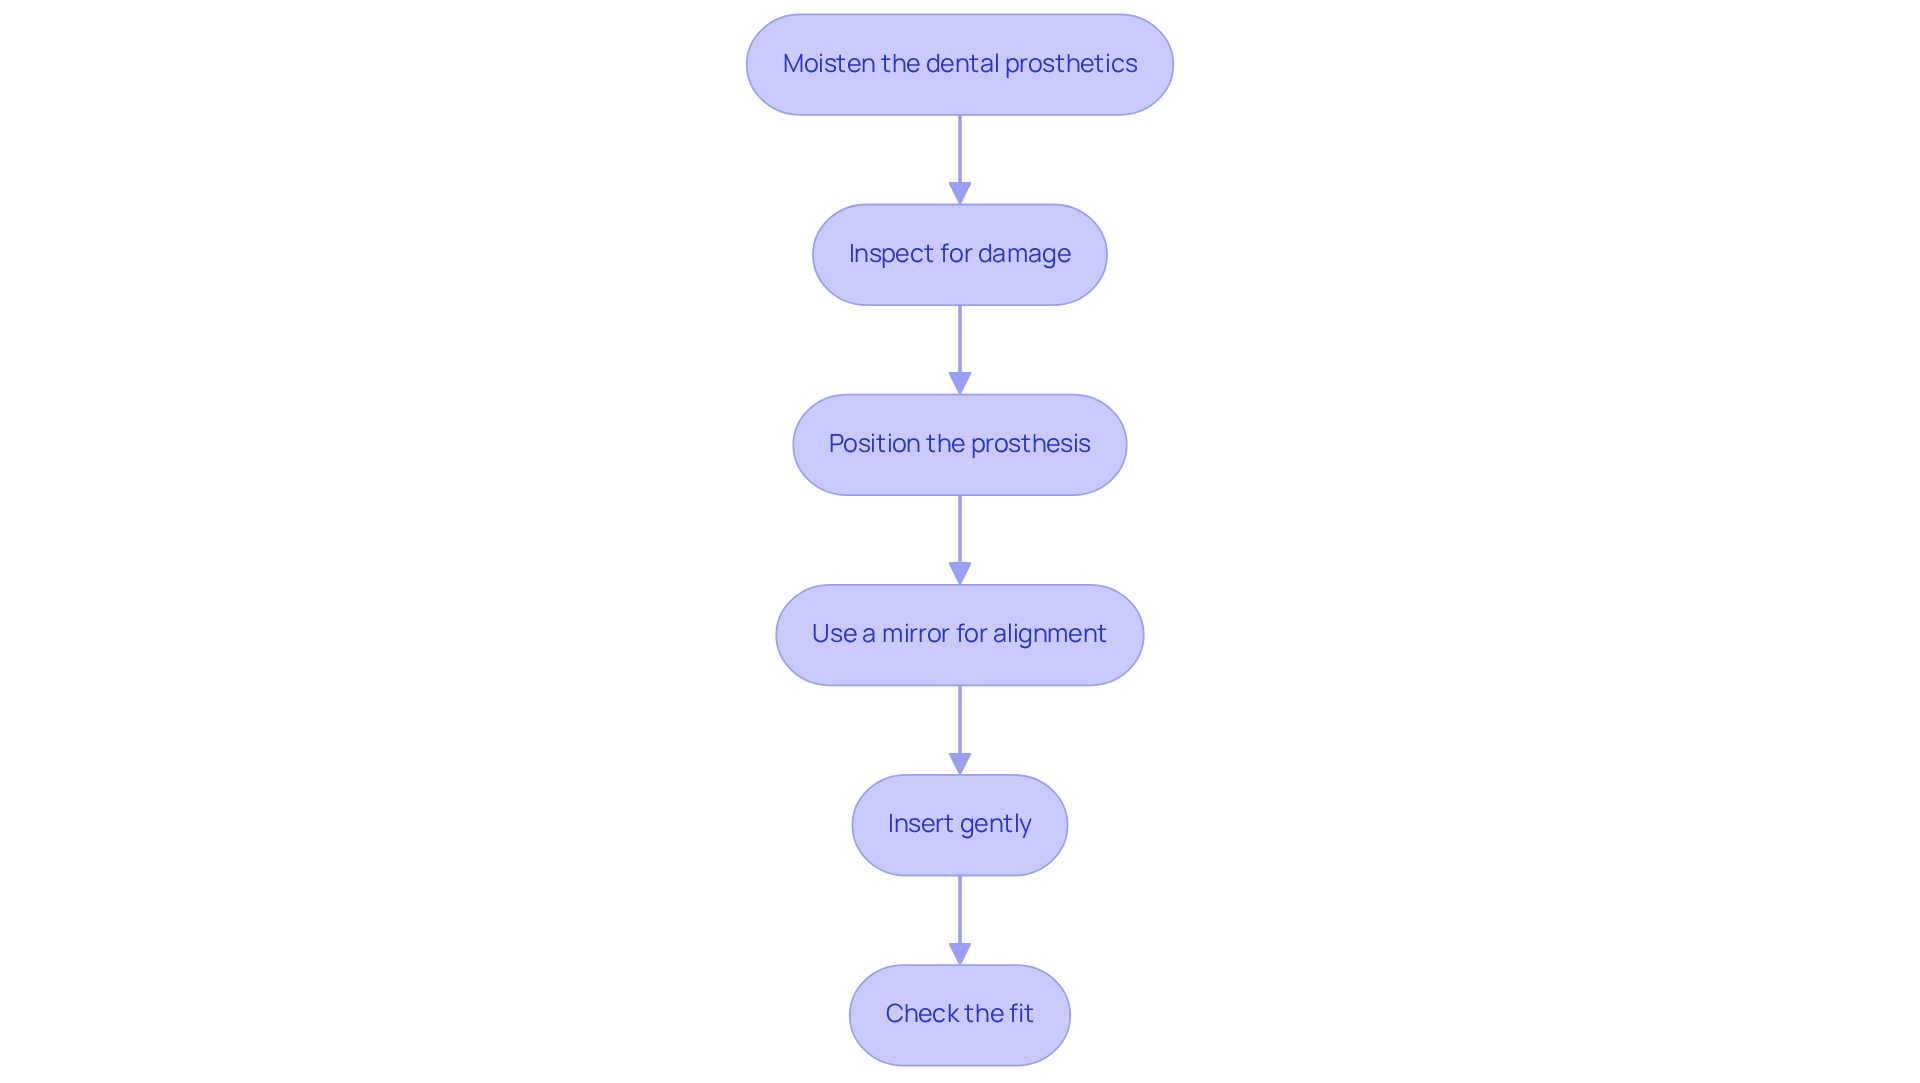
Inserting your dental appliances can feel daunting, especially when you’re unsure if you’re doing it right. To ensure a smooth removal process, it’s crucial to first learn how to take out partial dentures correctly. Follow these steps for optimal results:
- Moisten the dental prosthetics: Rinse them under warm water to facilitate handling and remove any debris.
- Inspect for damage: Before insertion, check the prosthesis for any debris or harm. If it doesn’t slide into place easily, don’t force it; take a moment to inspect it for visible problems instead.
- Position the prosthesis: Hold the prosthesis with your fingers, ensuring the clasps are oriented correctly for insertion.
- Using a mirror can really help you line up your prosthetic with your natural teeth, making the process smoother.
- Insert gently: Begin by placing the front of the dental appliance into your mouth, then press down gently to seat the back part. Avoid using your teeth to snap the dental appliance into position, as this can lead to damage.
- Check the fit: If you notice any discomfort or looseness, don’t hesitate to reach out to your dentist; they’re here to help you find the right fit.
Most individuals become comfortable with these techniques after a few weeks of practice, but if issues persist, an evaluation by your dentist is recommended to address any fitting problems. Furthermore, remember to place your partial prosthetics in a liquid or soaking solution when not in use to avoid the acrylic resin base from drying out. Regular dental exams and cleanings every three to six months are also essential for maintaining your oral health. Taking these steps can help you feel more confident and comfortable, ensuring your dental health remains a priority.
Follow Step-by-Step Instructions for Safe Removal
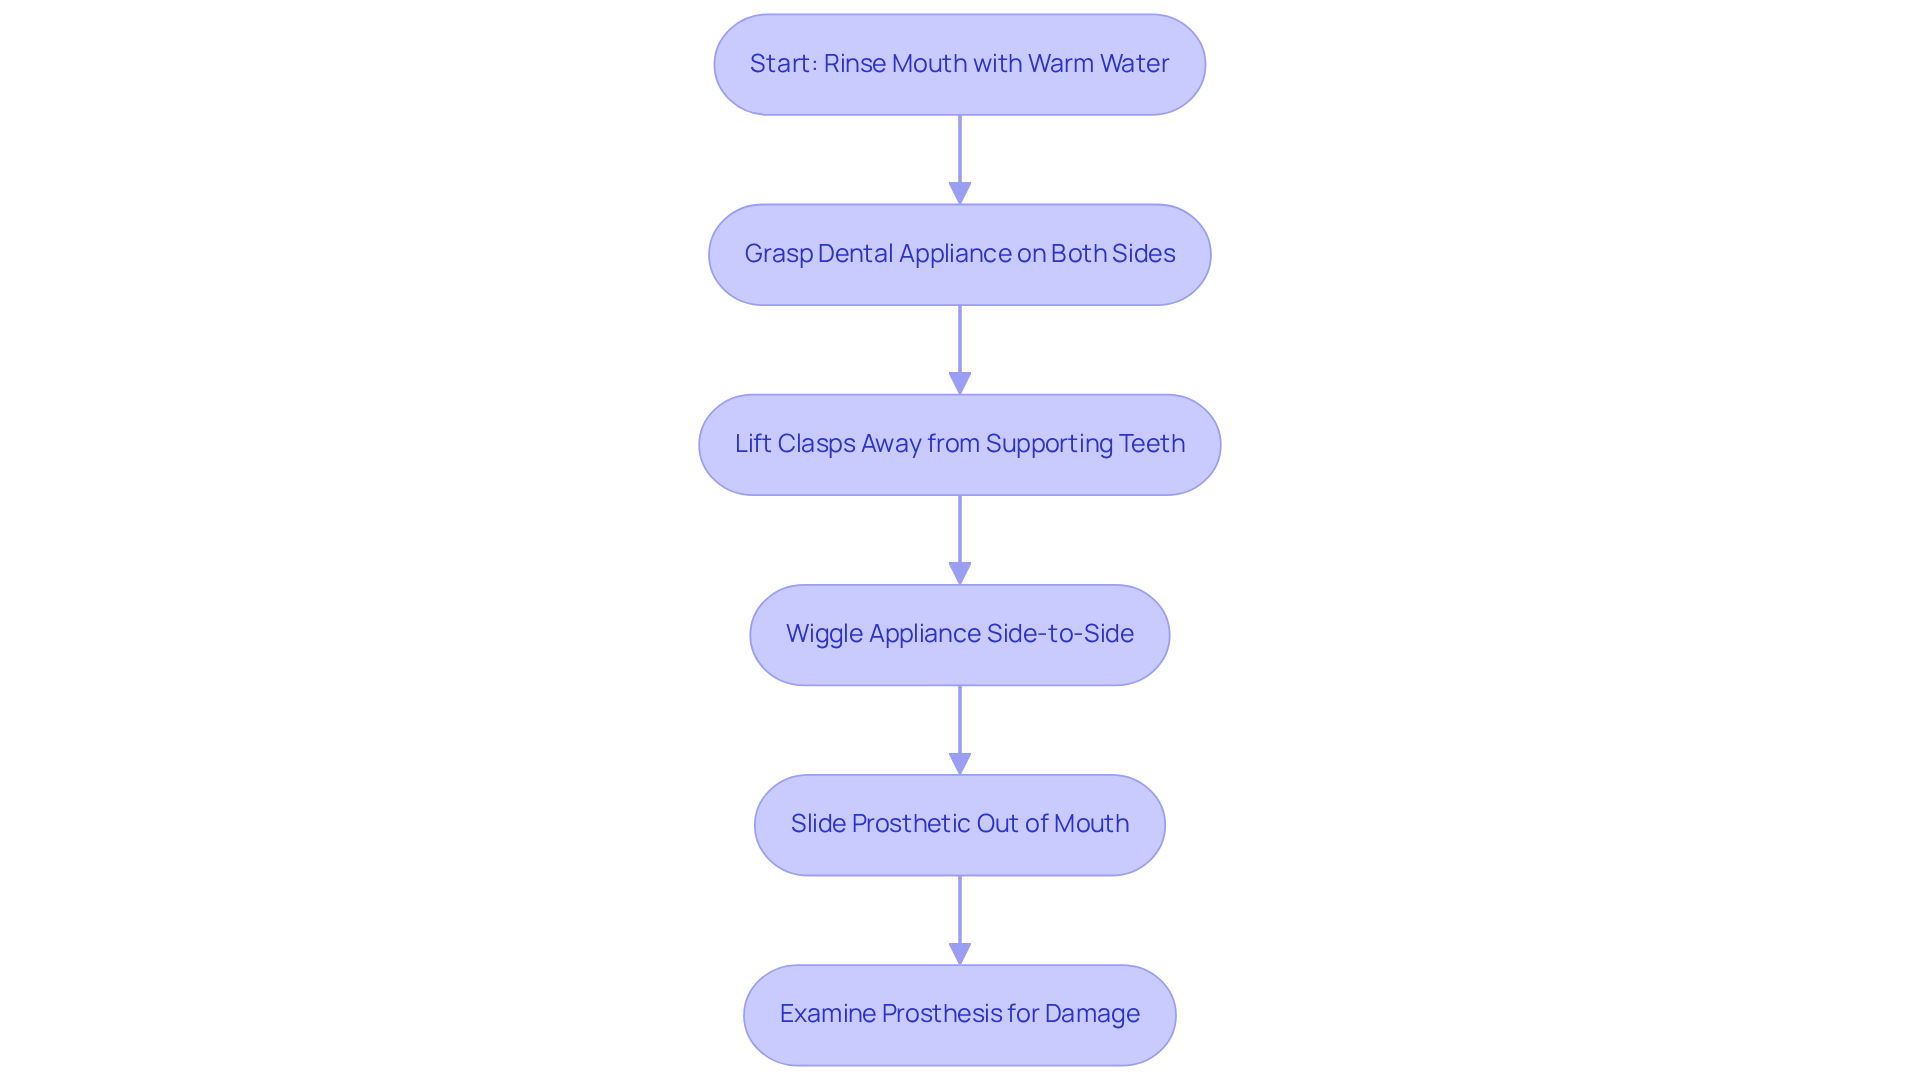
We understand that learning how to take out partial dentures can be a source of anxiety, but with the right approach, it can be a simple and safe process. Start by gently rinsing your mouth with warm water; this can help loosen any suction or food particles, making the process easier for you. Next, gently use your fingers to grasp the dental appliance on both sides, ensuring a firm grip on the clasps. With care, lift the clasps away from your supporting teeth using your fingertips or fingernails, freeing the dental appliance from its position. While holding on firmly, gently wiggle the appliance side-to-side; this can help loosen it further and make removal easier. Once it feels loose, carefully slide the prosthetic out of your mouth, following the same path it took during insertion. Remember, if it feels stuck, it’s okay to take a break and try again later to avoid discomfort or damage. After removal, take a moment to examine the prosthesis for any signs of damage or wear before cleaning it; this ensures it remains in good condition for your comfort.
These techniques are crucial for avoiding harm to both the prosthetic and your natural teeth. It is advised on how to take out partial dentures each night before sleep for cleaning and comfort. Furthermore, refrain from using hot water on dental appliances, as it can lead to warping. Consistent practice will improve your comfort and confidence in managing your dental prosthetics. For cleaning, use a soft oral brush instead of a regular toothbrush, and consult a dental prosthetist if you experience ongoing issues. By following these steps, you can ensure a comfortable experience and maintain the health of both your dentures and your natural teeth.
Troubleshoot Common Issues During Removal
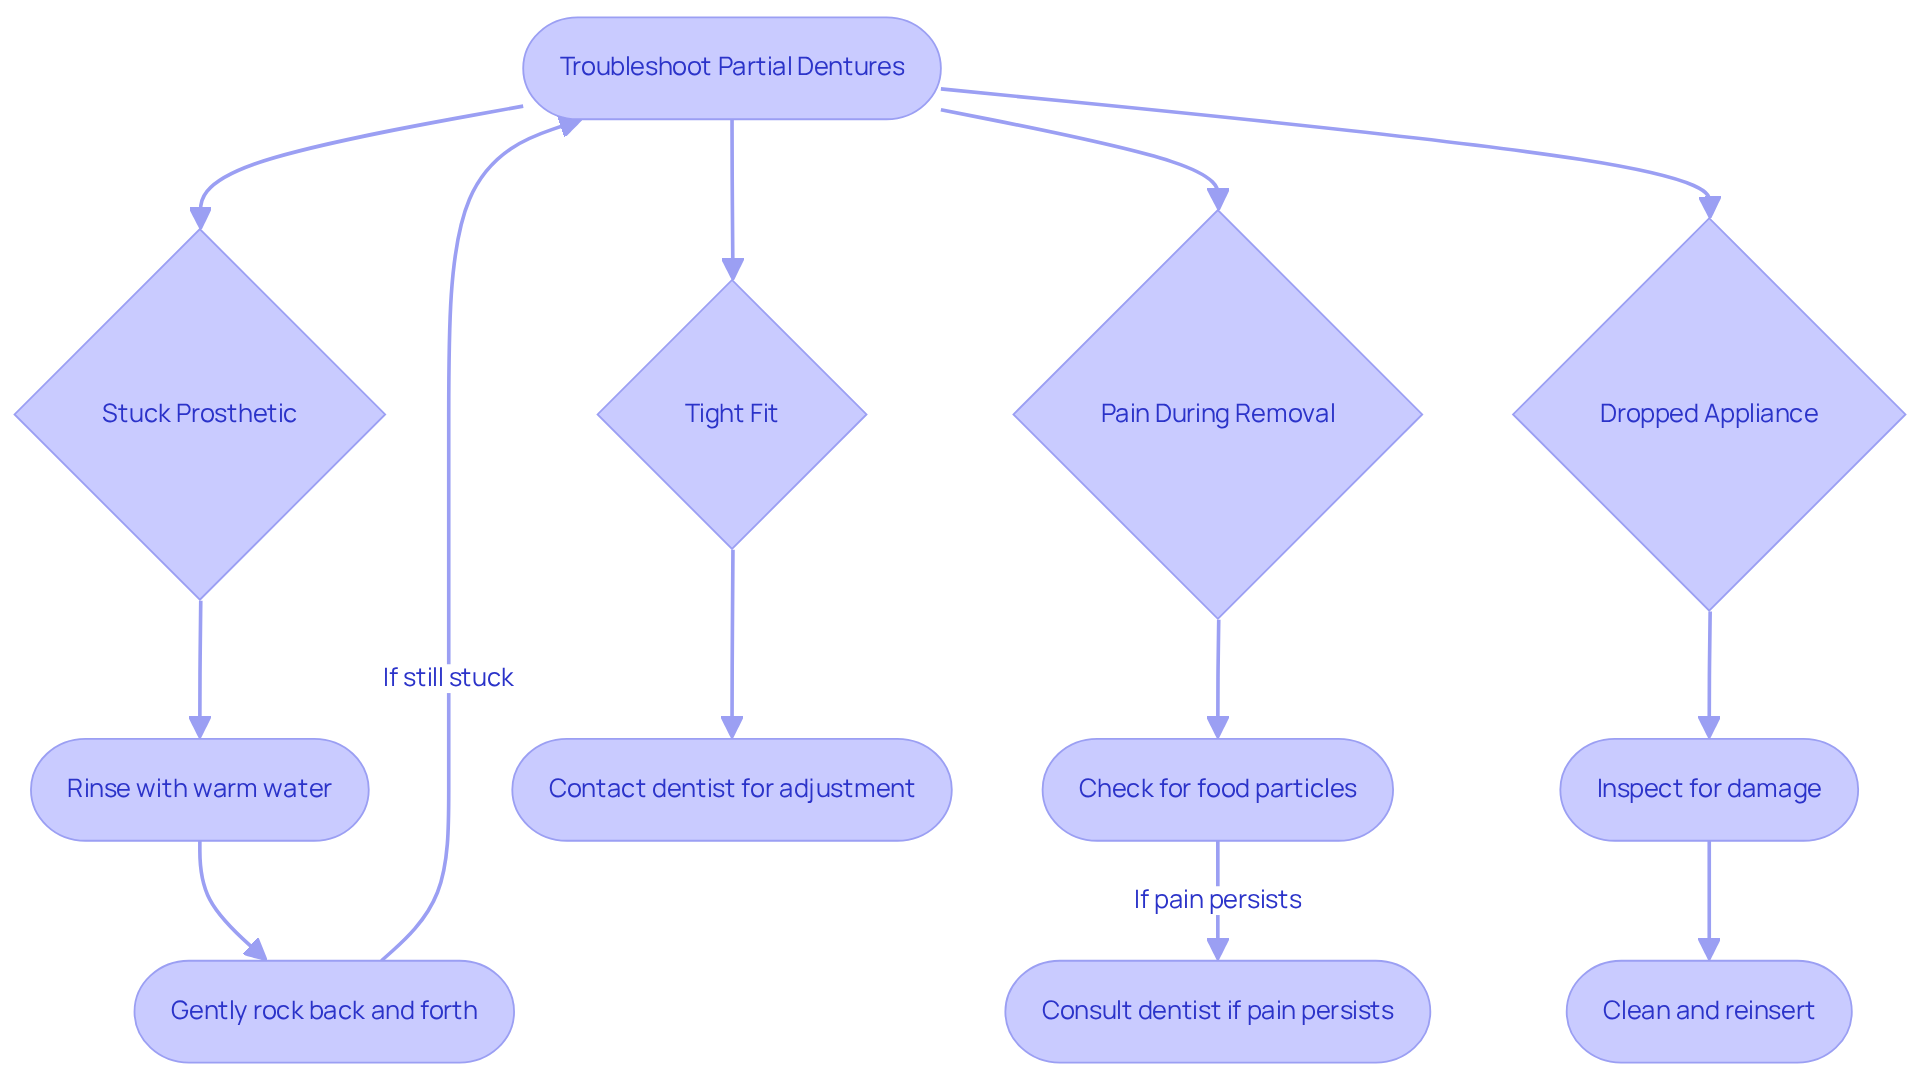
Understanding how to take out partial dentures can sometimes be a challenge, but you’re not alone in this experience. If your prosthetic feels stuck, rinse your mouth with warm water to help loosen any suction. To understand how to take out partial dentures, gently rock the appliance back and forth while applying even pressure. Additionally, using a cleanser for dental prosthetics can help prevent them from becoming stuck by eliminating adhesive residue.
If you feel any pain, please stop trying to remove it right away. Check for any food particles or debris trapped between the dental appliance and your gums. If the pain persists, it’s important to consult your dentist for further evaluation.
If the clasps are tough to lift, try using your fingertips or nails to gently nudge them as you learn how to take out partial dentures. If they remain resistant, applying a bit more warm water can help loosen them.
If your prosthetic feels too tight, it might need an adjustment. Contact your dentist for a fitting to ensure comfort and ease of removal. Regular dental check-ups are essential for monitoring the condition of your partial appliances.
If you drop the dental appliance, always have a soft cloth or towel underneath to catch it. If it falls, inspect it for any damage before cleaning and reinserting. To preserve their form and avoid warping, consider soaking your partial prosthetics overnight in a cleaning solution.
With these tips and regular dental visits, you can navigate the challenges of partial dentures with confidence.
Conclusion
Removing partial dentures can feel daunting, but it doesn’t have to be. Knowing how to take them out is essential for maintaining both comfort and oral health. This guide walks you through simple steps to help you remove your partial dentures safely and comfortably. By following these procedures, you can gain confidence in managing your dental appliances, ultimately enhancing your daily comfort and well-being.
It’s common to feel anxious about the discomfort that can come with removing partial dentures. Key points discussed include the importance of gathering the right tools, such as a denture removal tool and a mirror, to facilitate the process. Proper insertion techniques were also highlighted, emphasizing the need for a gentle approach to avoid damage. Additionally, troubleshooting common issues, such as dealing with suction or tightness, was addressed, providing practical solutions to enhance the removal experience.
When you master the removal of your partial dentures, you’ll feel more in control of your dental health. Regular check-ups with a dentist and consistent practice of these techniques will ensure that the process remains smooth and stress-free. By embracing these practices, you can transform your dental care routine into a source of confidence and comfort.
Frequently Asked Questions
What tools do I need to remove partial dentures?
You will need a denture removal tool, a mirror, lukewarm liquid for rinsing, and a soft cloth or towel to catch the dentures if they slip.
How does a denture removal tool help in the process?
A denture removal tool assists in easing the dentures out without applying excessive force, which is especially helpful for individuals with limited grip strength or arthritis.
Why is it important to rinse my mouth before removing dentures?
Rinsing your mouth with lukewarm liquid helps to loosen any suction or food particles that may be keeping the dentures in place.
What should I do before I start removing my dentures?
Before starting, wash your hands thoroughly, rinse your mouth with warm water, and position yourself comfortably in front of a mirror with good lighting.
What should I do if my dentures feel too tight?
If your dentures feel too tight, it is advisable to reach out to your dentist for assistance.
How can I ensure a controlled extraction process?
Using a mirror, whether handheld or wall-mounted, will help you see what you’re doing, ensuring a more controlled extraction process.
Need help applying this?
Talk to a billing specialist who knows your payer mix.
Westborough Dental Care welcomes new patients in South San Francisco. Book a visit to meet Dr. Zoulas and the team.
Schedule a meeting