
Innovations in Dental Technology
How to Use Temporary Dental Crown Adhesive: A Step-by-Step Guide
Introduction
Many people feel anxious about dental procedures, especially when they involve temporary solutions. We understand that knowing how to use temporary dental crown adhesive can feel overwhelming, but we’re here to help you find comfort and stability during this time.
We’re here to walk you through a simple, step-by-step approach to:
- Applying adhesive
- Preparing your tooth
- Maintaining your temporary crown
You might be wondering, what if the adhesive doesn’t hold, or what if discomfort arises? Understanding these challenges can help you feel more prepared and less alone in your dental journey.
Gather Necessary Tools and Materials
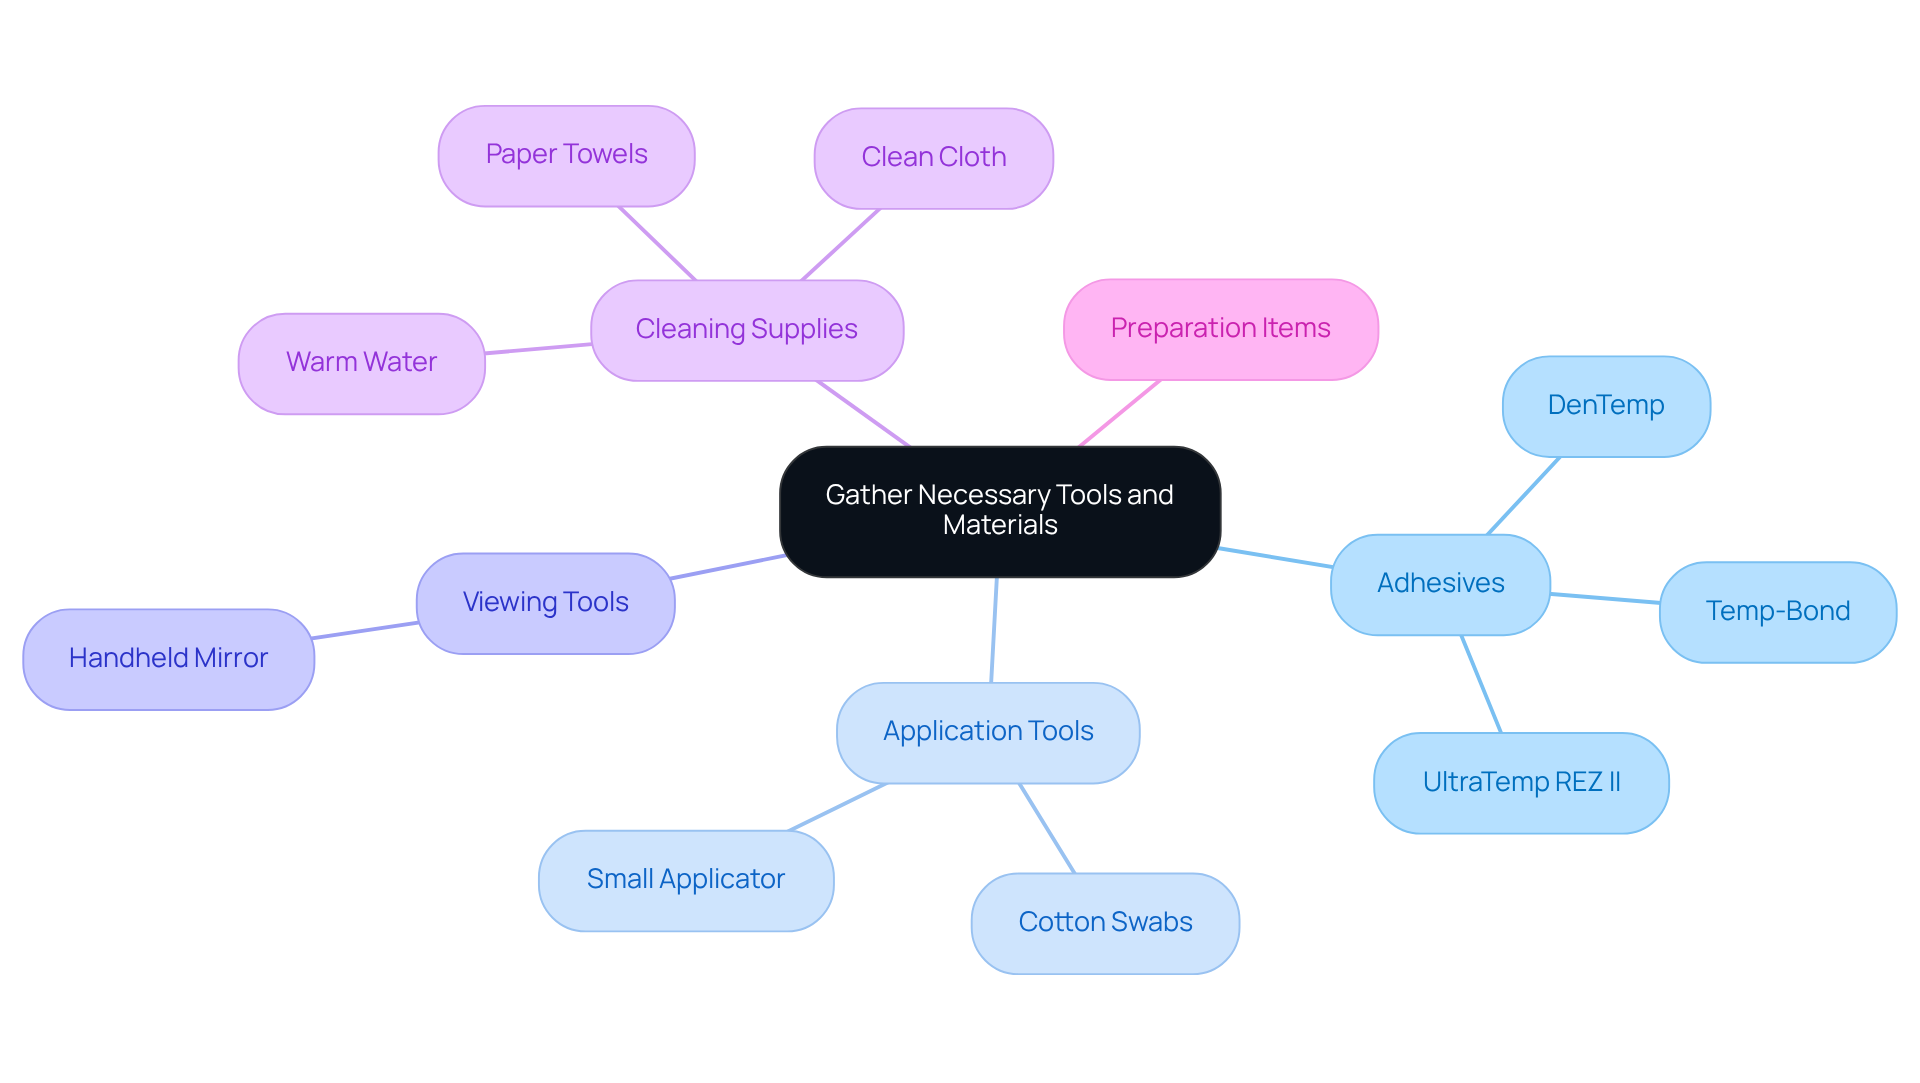
Feeling anxious about your dental care? Let’s make this easier by gathering a few essential tools.
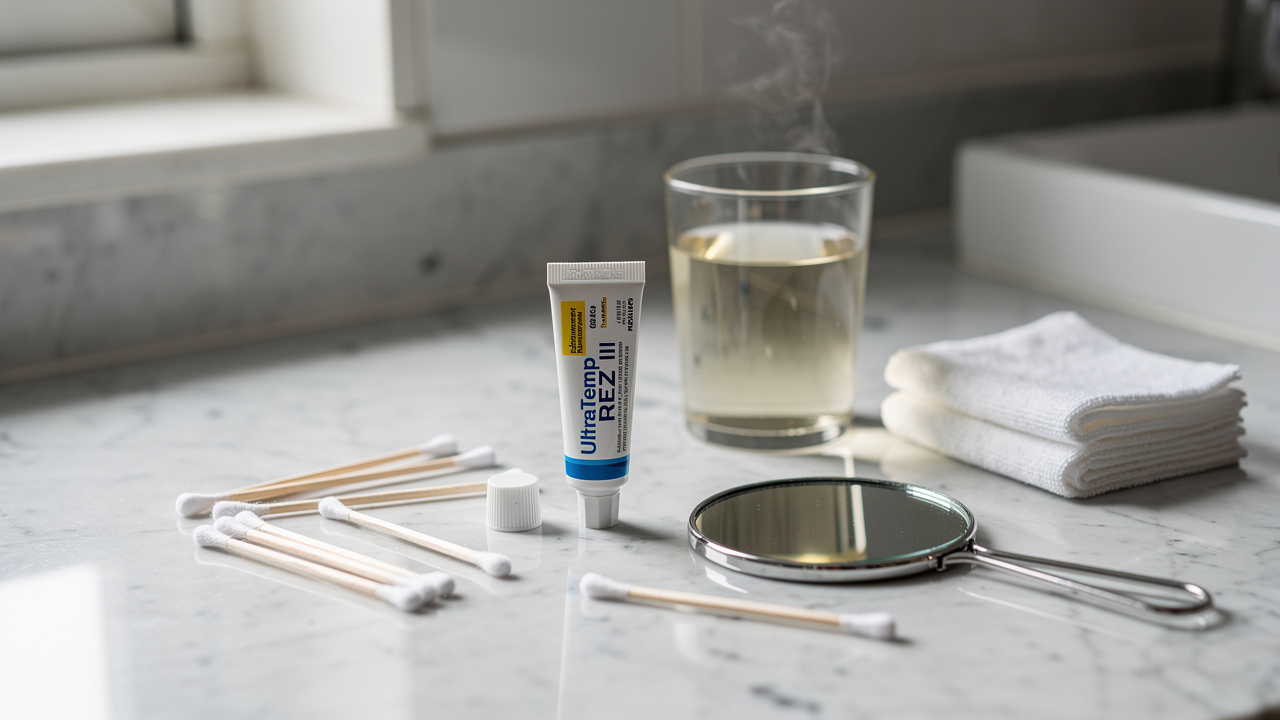
First, you’ll need temporary dental crown adhesive. This can be found at most pharmacies or online. Look for products specifically designed for dental use, including temporary dental crown adhesive options like Temp-Bond or DenTemp. You might be surprised to know that there are many reliable options available to help you. One great choice is UltraTemp REZ II, known for its gentle formula that helps create a strong bond without causing irritation.
Next, grab some cotton swabs or a small applicator. These will help you apply the adhesive precisely, ensuring a better fit. A handheld mirror is also essential; it allows you to see your dental structure and the cap clearly during the application.
Don’t forget warm water for rinsing your mouth and cleaning the cap and dental structure. This step is crucial for achieving a better bond. Lastly, have some paper towels or a clean cloth handy to dry the cap and tooth before application.
Gathering the right tools can feel overwhelming, especially when you’re already dealing with discomfort. But with the right preparation, you can make this process smoother and less stressful. With the right tools at hand, you can approach your dental care with confidence and peace of mind.
Prepare the Tooth and Adhesive
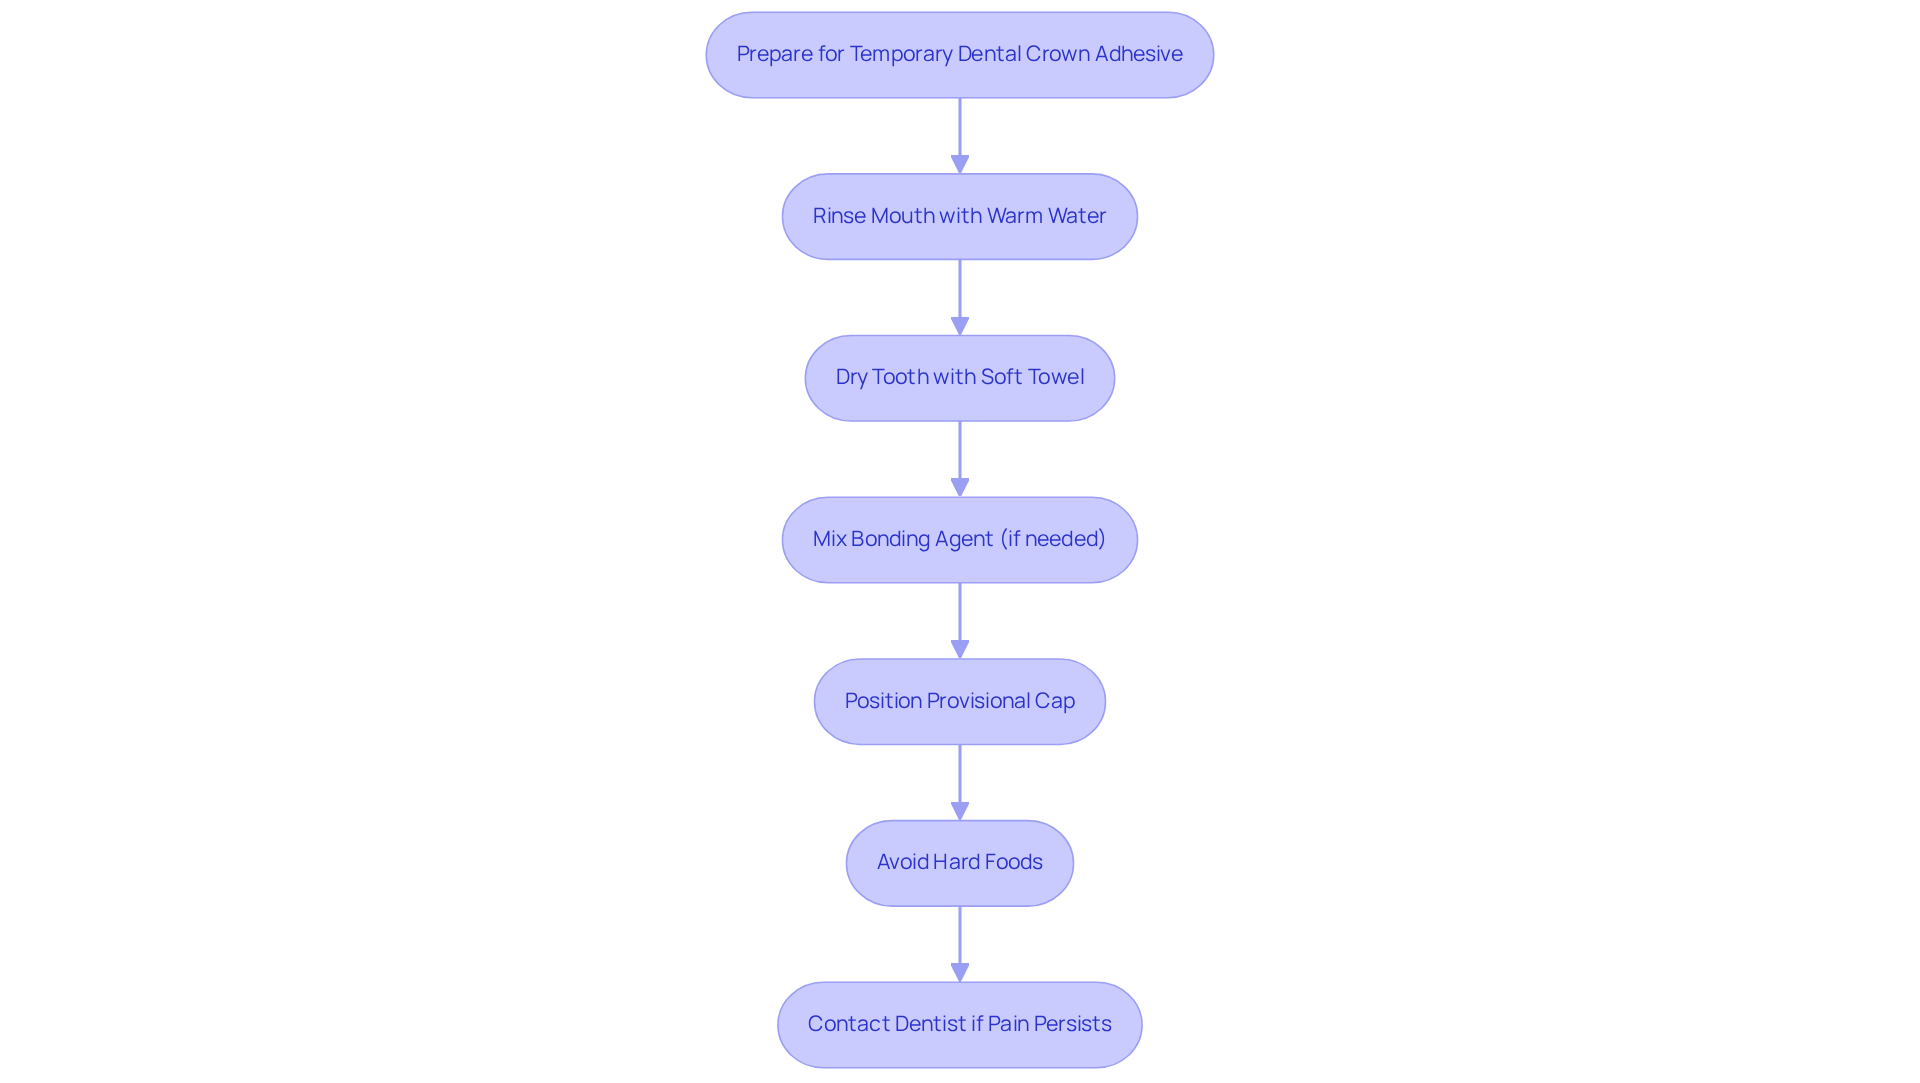
Preparing for a temporary dental crown adhesive can feel overwhelming, but we’re here to guide you through each step.
Start by gently rinsing your mouth with warm water; this helps clear away any debris, making the process smoother for you.
Carefully dry the tooth with a soft paper towel or cloth; this is an important step to ensure everything bonds well.
If your bonding agent needs mixing, just follow the manufacturer’s instructions closely; we know it can feel a bit tricky. For pre-mixed bonding agents, ensure that the applicator is clean and ready for use.
Before applying the temporary dental crown adhesive, take a moment to position the provisional cap on the tooth. This way, you can confirm it fits properly. If it doesn’t feel right, don’t hesitate to make adjustments until it feels snug.
After placing the provisional cap, it’s best to avoid hard, tough, or sticky foods. This helps prevent dislodging or damaging the cap, allowing you to feel more at ease.
Remember, you’ll have your provisional cap for about 2-3 weeks while waiting for the final one, and we’re here to support you during this time.
You might feel a bit uneasy after the placement of the provisional cap, and that’s completely normal. If any pain persists or worsens, please reach out to your dentist for further assistance. You are not alone in this process.
Apply the Temporary Dental Crown Adhesive
Applying the temporary dental crown adhesive to your temporary crown can feel daunting, but we’re here to guide you through it step by step.
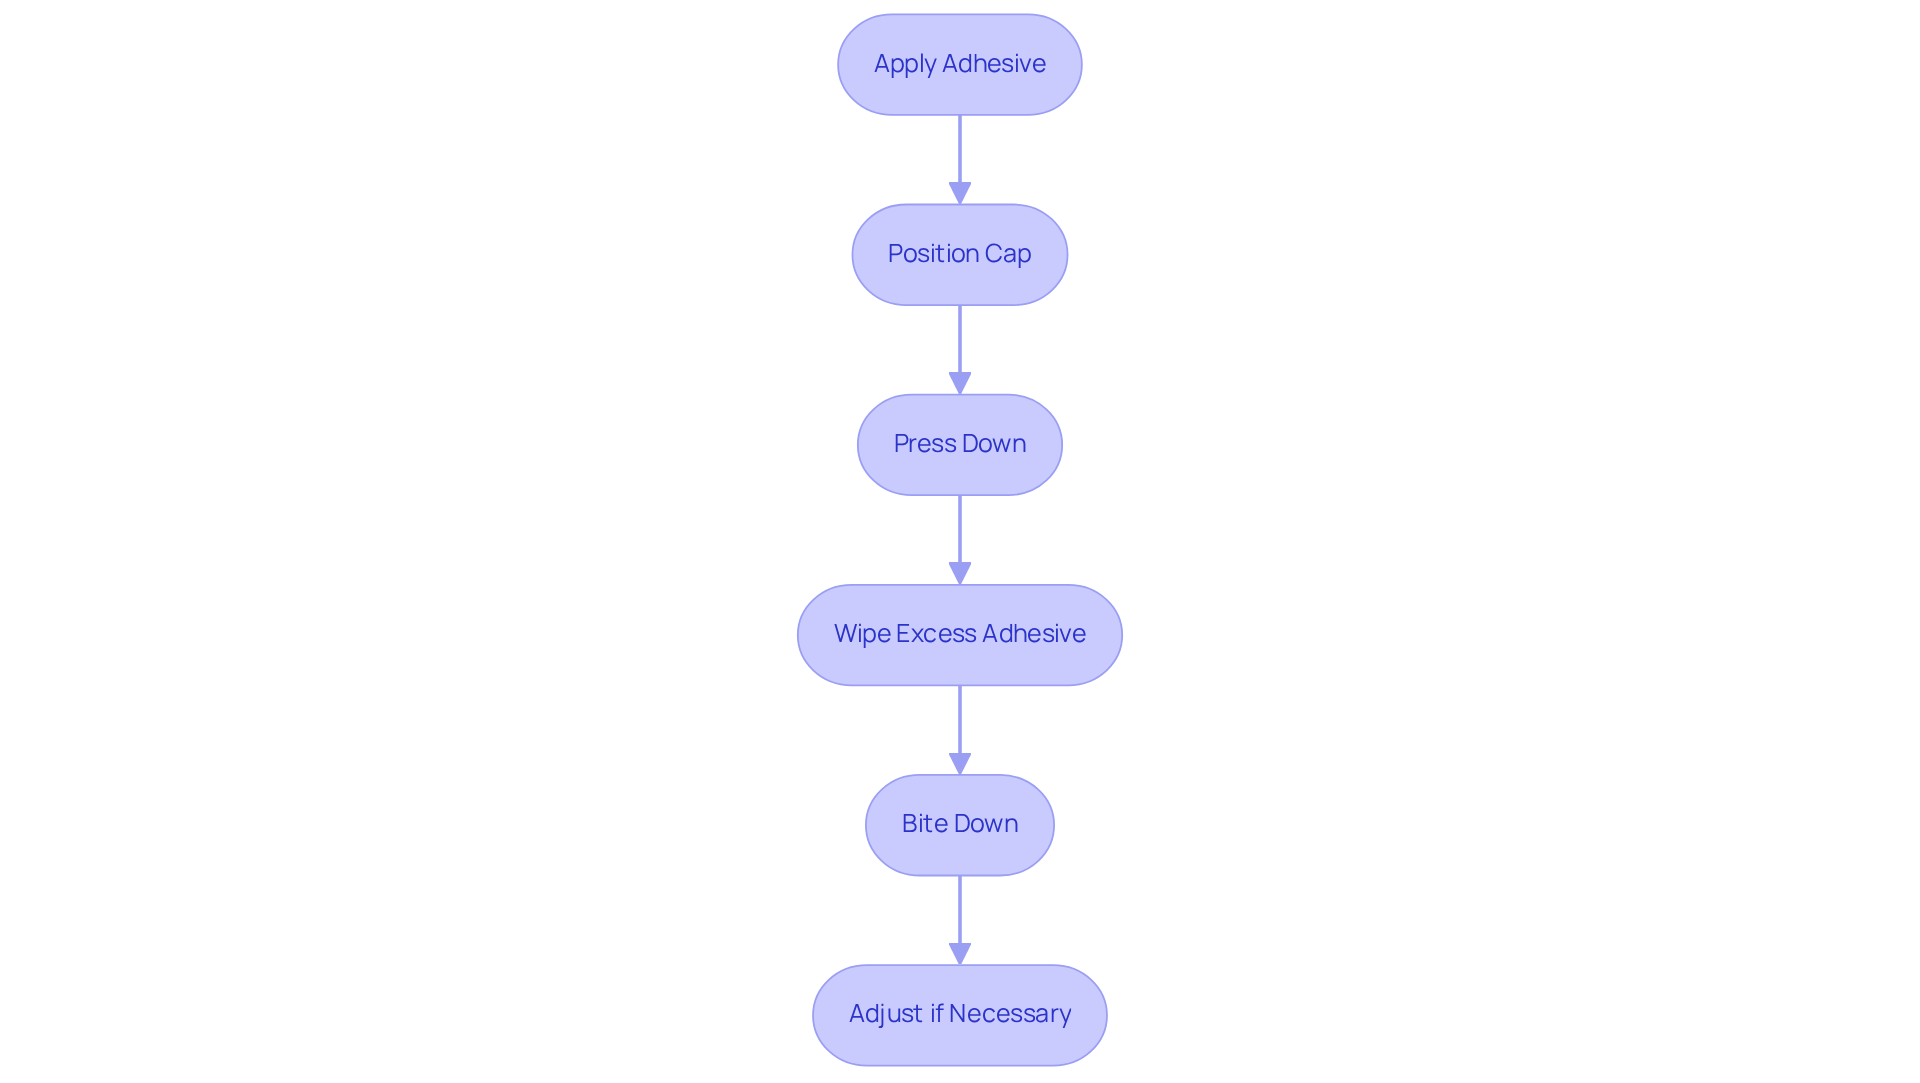
We understand that using the temporary dental crown adhesive can be a bit nerve-wracking, but take a deep breath and gently apply a small amount inside the provisional cap. Ensure that the temporary dental crown adhesive covers the entire inner surface of the cap.
Now, carefully position the temporary cap over your prepared tooth, ensuring it aligns comfortably with your other teeth. You’re doing great!
Once the cap is in place, gently press down to help the temporary dental crown adhesive adhere properly. Remember, it’s important to be gentle to avoid any discomfort.
If any adhesive has squeezed out, don’t worry! Just use a cotton swab or cloth to gently wipe it away, ensuring everything looks neat and tidy.
Finally, gently bite down to check that everything feels normal. If something feels off, it’s okay to adjust the position of the cap until it feels just right. By following these steps, you can feel confident that your temporary crown will stay secure, allowing you to focus on your recovery without worry.
Post-Application Care and Troubleshooting
Taking care of your temporary crown is essential for your comfort and dental health, and we’re here to guide you through it:
- Choose soft foods: In the first day, it’s best to choose soft foods and avoid sticky or hard items that might disturb your temporary crown. Chewing on the opposite side of your mouth can help reduce pressure on the provisional cap.
- Practice gentle oral hygiene: Continue brushing your teeth, but be gentle around the temporary cap. A soft-bristled toothbrush is your best friend here. Instead of flossing directly next to the dental restoration, use the temporary dental crown adhesive technique to slide the floss out to the side, keeping everything clean without risking dislodging it.
- Be aware of sensitivity: You might feel some mild sensitivity for a little while after placement, and that’s completely normal. If you experience persistent pain or sensitivity, rinsing your mouth with warm salt water can help soothe the area. Dr. Uparika Sharma emphasizes that if discomfort continues, reaching out to your dentist is important for further evaluation.
- Troubleshooting tips: If your provisional cap feels loose, gently take it out and clean both the cap and the tooth. Reapply the temporary dental crown adhesive as instructed, but avoid using household glues, as they can be dangerous. If problems persist, don’t hesitate to consult your dentist to prevent complications. Remember, provisional caps are designed to last just two to three weeks, so keeping track of your dental appointments is essential for the timely installation of the final cap.
By following these gentle care tips, you can feel confident in the longevity of your temporary crown and your overall dental well-being.

Conclusion
We understand that the thought of applying a temporary crown can feel overwhelming, but you are not alone in this journey. This guide is here to walk you through each step, from gathering what you need to applying the adhesive with care. With the right guidance, you can feel secure and at ease during this process, knowing your temporary crown is in place.
We’ll highlight how to prepare your tooth and adhesive, apply them gently, and care for your crown afterward. Every step is crafted to help you feel comfortable and supported, making this transition as smooth as possible until your final crown arrives. And if you run into any bumps along the way, our troubleshooting tips are here to help you feel reassured and supported.
Knowing how to use temporary dental crown adhesive gives you the confidence to take charge of your dental health during this time. Staying informed and proactive can help you feel more at ease during this interim period. Keeping in touch with your dentist and following care guidelines will help ensure a smooth path to your successful dental restoration.
Frequently Asked Questions
What tools do I need for applying temporary dental crown adhesive?
You will need temporary dental crown adhesive, cotton swabs or a small applicator, a handheld mirror, warm water for rinsing, and paper towels or a clean cloth.
Where can I find temporary dental crown adhesive?
Temporary dental crown adhesive can be found at most pharmacies or online. Look for products specifically designed for dental use, such as Temp-Bond, DenTemp, or UltraTemp REZ II.
Why is it important to use a handheld mirror during the application?
A handheld mirror is essential as it allows you to see your dental structure and the cap clearly during the application, ensuring a better fit.
What is the purpose of using warm water in the process?
Warm water is important for rinsing your mouth and cleaning the cap and dental structure, which helps achieve a better bond.
How can I ensure a precise application of the adhesive?
Using cotton swabs or a small applicator will help you apply the adhesive precisely, ensuring a better fit for the temporary crown.
What should I do if I feel overwhelmed while gathering these tools?
It’s normal to feel overwhelmed, especially when dealing with discomfort. Preparing and gathering the right tools can help make the process smoother and less stressful.
Need help applying this?
Talk to a billing specialist who knows your payer mix.
Westborough Dental Care welcomes new patients in South San Francisco. Book a visit to meet Dr. Zoulas and the team.
Schedule a meeting